


Mold in crawl spaces is often hidden but can have a serious impact on both structural integrity and indoor air quality. Because these spaces are dark, humid, and rarely inspected, mold can grow for months before being noticed. Professional remediation follows a structured process designed not just to remove mold but to eliminate the conditions that allow it to return.
Companies like Triangle Radiant Barrier follow a detailed, safety-focused method for handling these situations. You can learn more about their approach here: Triangle Radiant Barrier
This guide explains the complete step-by-step mold removal from crawl space process used by professionals, including inspection, containment, cleaning, and long-term prevention strategies.
Understanding Mold Growth in Crawl Spaces
Crawl spaces are highly vulnerable to mold because they naturally trap moisture and have limited airflow. When warm air meets cooler surfaces underneath the home, condensation forms, creating ideal conditions for fungal growth. Over time, this moisture gets absorbed into wood, insulation, and soil surfaces, allowing mold colonies to spread silently.
Most homeowners only notice the problem when indoor air quality starts changing or musty odors become noticeable. At that stage, crawl space mold remediation becomes necessary to restore safe conditions. Moisture issues may also lead to structural weakening if left untreated for long periods.
Proper understanding of these conditions is essential before beginning any mold removal from crawl space process because eliminating mold alone is not enough. The underlying moisture source must also be addressed to prevent recurrence.
Step 1 – Detailed Inspection and Assessment
The first step in any mold removal from crawl space process is a complete inspection. Professionals evaluate moisture levels, visible mold growth, and hidden contamination areas.
Inspection includes:
- Measuring humidity levels
- Checking wood framing for fungal growth
- Identifying water intrusion sources
- Inspecting insulation and vapor barriers
- Assessing ventilation conditions
This step helps determine the severity of the problem and whether full remediation or partial treatment is required.
Homeowners often start by booking an assessment through a free estimate service to understand the extent of damage before beginning treatment.
Step 2 – Identifying Warning Signs of Mold Contamination
Before remediation begins, professionals also evaluate visible and hidden warning signs. Mold is not always visible, so early detection plays a critical role in preventing structural damage.
Common warning signs include:
- Musty odors inside the home
- Increased humidity indoors
- Discolored wood surfaces
- Allergy or respiratory symptoms
- Damp insulation
These indicators often suggest the need for urgent crawl space mold remediation to avoid further spread.
Step 3 – Containment of the Crawl Space
Containment is one of the most important stages of crawl space mold remediation. Without it, mold spores can spread to other areas of the home during cleaning.
Containment methods include:
- Sealing crawl space vents
- Installing plastic barriers
- Using negative air pressure systems
- HEPA air filtration units
This step ensures that mold removal crawl space work does not increase contamination in living spaces above.
Step 4 – Removal of Contaminated Materials
Once containment is established, technicians begin removing materials that cannot be restored. This step ensures that mold does not continue spreading from affected surfaces.
Materials commonly removed:
- Wet or mold-infested insulation
- Damaged vapor barriers
- Severely contaminated wood sections
- Organic debris that holds moisture
Proper disposal is essential during mold removal in crawl space to avoid cross-contamination and ensure safe handling of hazardous materials.
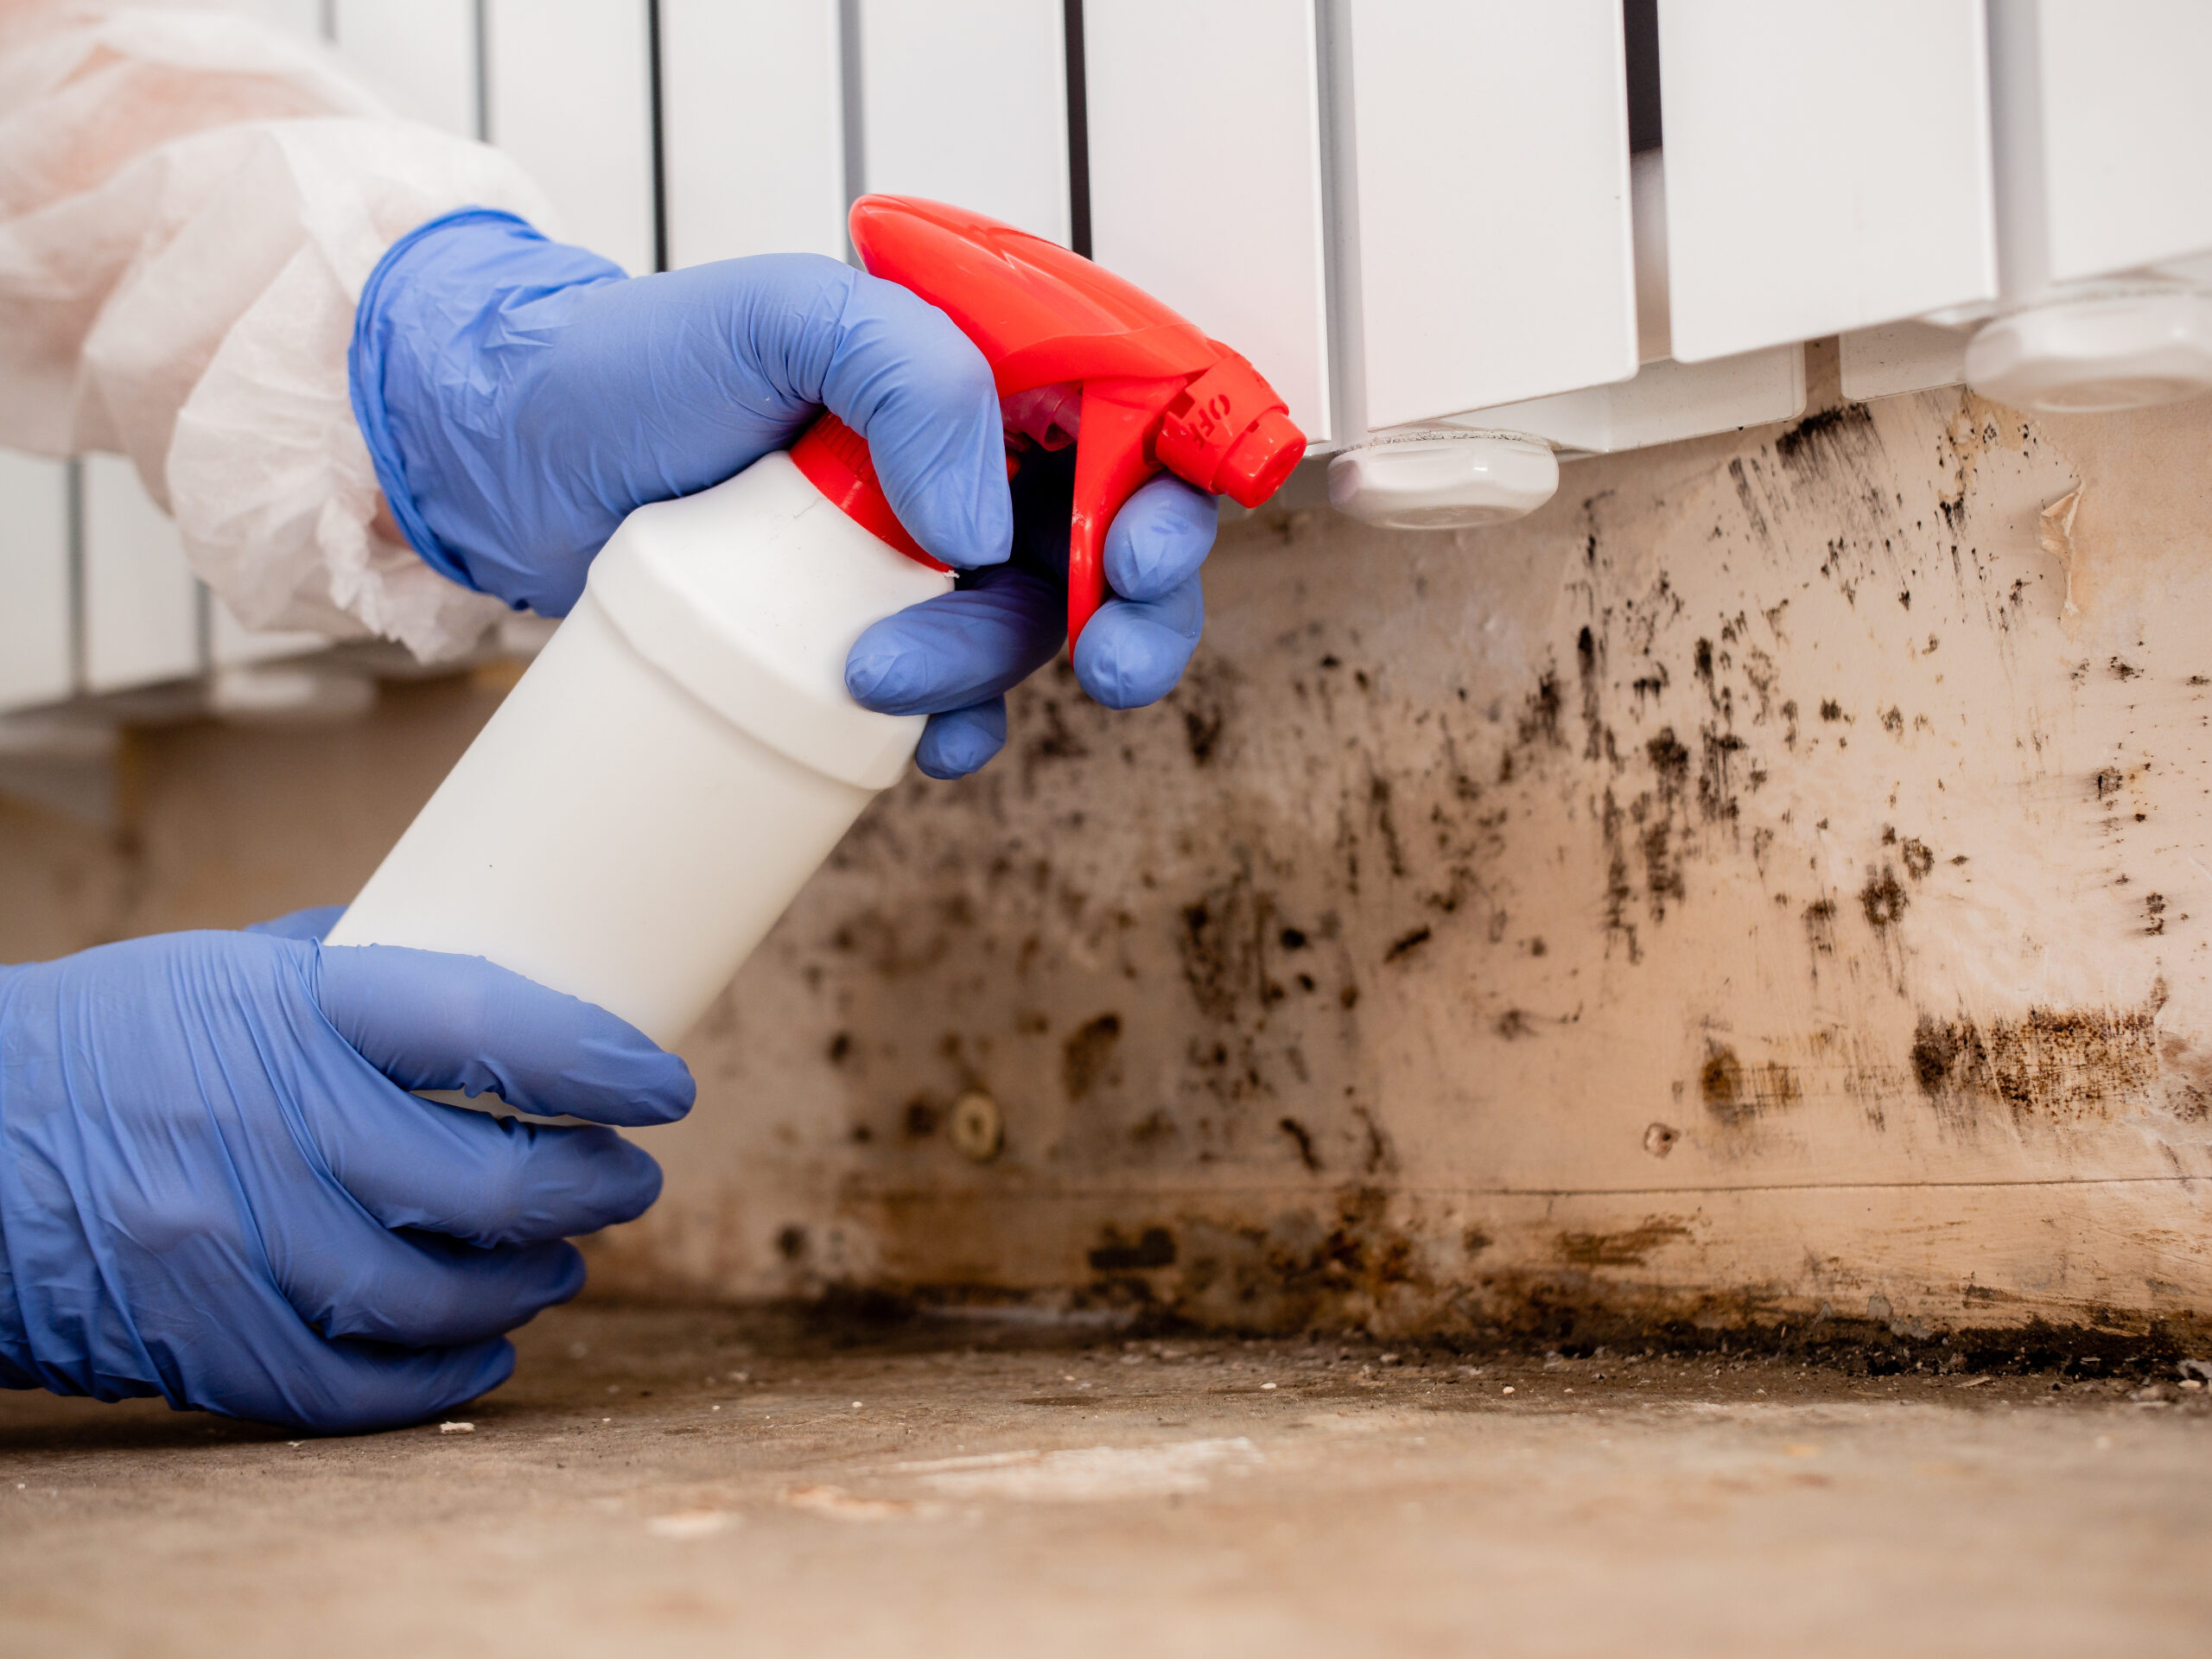
Step 5 – Deep Cleaning and Mold Treatment
After damaged materials are removed, professionals begin deep cleaning the crawl space. This is the core stage of mold removal from crawl space, where remaining surfaces are treated.
Cleaning methods include:
- HEPA vacuuming of spores
- Antimicrobial surface treatments
- Scrubbing structural wood surfaces
- Encapsulation of minor affected areas
This stage ensures that even microscopic spores are eliminated to prevent regrowth.
For homeowners seeking a structured solution, detailed remediation services can be reviewed here: crawl space mold remediation Raleigh NC
Step 6 – Moisture Control and Prevention Measures
Mold cannot survive without moisture. That is why controlling humidity is a critical step in long-term remediation success.
Moisture control methods include:
- Installing vapor barriers
- Sealing foundation cracks
- Improving drainage systems
- Installing dehumidifiers
- Enhancing crawl space ventilation
Without this step, even professional cleaning may not prevent mold from returning. This is why crawl space mold remediation cost is often influenced heavily by moisture correction needs.
Step 7 – Encapsulation for Long-Term Protection
Encapsulation is a preventive solution used in advanced crawl space mold remediation cases. It creates a sealed environment that reduces moisture entry and mold regrowth.
Encapsulation includes:
- Heavy-duty vapor barrier installation
- Sealing all vents and gaps
- Adding insulation to walls
- Installing humidity control systems
This approach provides long-term protection and reduces the likelihood of future mold removal crawl space requirements.
Step 8 – Final Inspection and Quality Verification
After all remediation steps are completed, a final inspection is performed to ensure the crawl space is safe and dry.
Final inspection includes:
- Moisture level testing
- Visual mold clearance check
- Air quality verification
- Structural assessment
This ensures that the mold removal in crawl space process has been successful and no active contamination remains.
Understanding Crawl Space Mold Remediation Cost
The crawl space mold remediation cost depends on several important factors.
Key cost factors:
- Size of crawl space
- Severity of mold growth
- Level of moisture damage
- Material replacement needs
- Encapsulation requirements
More severe cases require advanced treatment, while minor issues may only need cleaning and moisture control.
Homeowners can better understand service expectations by reviewing professional guidance on the main website: Triangle Radiant Barrier
Why Professional Mold Removal Is Necessary
DIY methods often fail because they only address surface mold without fixing moisture problems underneath. Professional mold removal crawl space services ensure complete remediation.
Benefits of professional service:
- Proper containment of spores
- Deep cleaning of structural materials
- Long-term moisture control
- Reduced risk of recurrence
- Improved indoor air quality
Professionals follow strict procedures that ensure mold is not only removed but prevented from returning.
When Homeowners Should Take Action
Delaying remediation can lead to serious structural and health problems. Homeowners should act quickly if they notice any warning signs.
You should schedule an inspection if you observe:
- Persistent musty odors
- Visible mold patches
- High humidity in living areas
- Damp or sagging insulation
More detailed warning indicators are explained here: crawl space mold warning signs
Early intervention reduces repair costs and prevents structural deterioration.
Conclusion
A complete step-by-step mold removal from crawl space process involves inspection, containment, removal, cleaning, moisture control, encapsulation, and final inspection. Each stage is necessary to ensure long-term protection and prevent mold from returning.
Taking timely action ensures a healthier home environment and protects the structural integrity of the property for years to come. Get in touch with Triangle Radiant Barrier to eliminate crawl space mold and improve your indoor air quality.
Before/After images not found.