FOLLOW US:

Uncategorized

Uncategorized

The Secret to Lower Energy Bills: Radiant Barriers Explained 

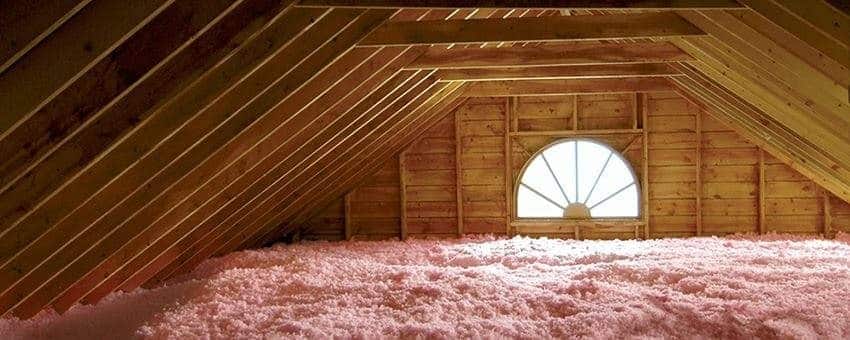
Saving money on energy bills is something everyone wants. Whether it’s summer or winter, the cost of heating and cooling your home can really add up. But did you know there’s a simple way to cut down on these costs? The answer lies right above your head — in your attic. The key is using radiant barriers.  In this blog, you’ll learn what radiant barriers are, how they work, and why adding a radiant barrier in attic spaces can make a huge difference in your comfort and your wallet. We’ll keep everything easy to understand, and by the end, you’ll feel confident about how this one change can make your home more energy efficient.  Understanding Radiant Barriers  Radiant barriers are special materials installed in attics that reflect heat instead of absorbing it. Most of the time, they are made from aluminum foil and are installed under the roof.  How Radiant Barriers Work  Your attic is where most of the heat in your home enters during hot days. When the sun shines on your roof, it gets hot, and that heat travels into your attic. Without any protection, the heat moves down into your living space, making your air conditioner work harder.  A radiant barrier in the attic stops this heat by reflecting it away before it can enter your home. Instead of absorbing the heat like regular insulation, radiant barriers reflect it, keeping your home cooler.  Benefits of Using Radiant Barriers  There are many reasons to install a radiant barrier in attic areas, especially if you’re looking to reduce energy costs and improve comfort.  Lower Energy Bills  By reflecting heat out of your attic, radiant barriers help your air conditioner run less often. This can lower your energy bill, especially during hot seasons.  Improved Comfort  Homes with attic radiant barrier systems stay cooler in the summer. You’ll feel more comfortable without cranking up the AC.  Longer Life for HVAC Systems  When your heating or cooling system doesn’t have to work so hard, it lasts longer. This can save you from expensive repairs or early replacement.  Works with Other Insulation  Radiant barriers don’t replace your current insulation. They work with it. If you already have fiberglass or foam insulation, adding a radiant barrier just gives you more protection from heat.  Where and How Radiant Barriers Are Installed  Most of the time, you install radiant barriers in the attic. That’s the best place to stop the heat before it reaches the rest of your home.  Types of Installation  There are a few ways to install an attic radiant barrier:  Roof Decking: The barrier is attached under the roof.  Rafter Installation: The barrier is stapled between the wooden beams (rafters).   Attic Floor: Sometimes placed over existing insulation, though this is less common.   Let’s take a quick look at where radiant barriers are most effective.  Location of Radiant Barrier  Best Use  Efficiency Benefit  Under Roof Decking  New homes or roof replacements  Very High  Between Rafters  Existing homes  High  On Attic Floor  Cooler climates  Moderate  The best method for you depends on your home, your climate, and your energy goals.  Radiant Barriers Work Best in Hot Climates  If you live in a hot area where the sun beats down almost every day, installing a radiant barrier in the attic can make a big difference. States like Texas, Florida, Arizona, and California are perfect places to use radiant barriers.  Even in milder areas, though, these barriers still help. They keep your home from heating up too fast during sunny days and support your insulation all year round.  How Radiant Barriers Compare to Traditional Insulation  You may wonder how radiant barriers stack up against traditional insulation like fiberglass batts or foam. Here’s a simple breakdown:  Reflects vs Absorbs  Traditional insulation absorbs heat and slows it down. That’s great, but it doesn’t stop the heat from getting inside your attic in the first place. Radiant barriers actually reflect the heat away before it enters.  Works in Summer More Than Winter  Insulation is great for winter, keeping the heat inside. But in summer, insulation alone might not be enough. That’s where a radiant barrier in attic areas adds power. It targets summer heat gain directly.  Cost of Radiant Barriers  Installing radiant barriers is more affordable than you might think, especially considering how much you can save over time. On average, it costs between $0.10 to $0.80 per square foot, depending on the type of barrier and installation method.  While there’s an upfront cost, most homeowners see a return on investment within a few years through lower energy bills.  Signs You Need a Radiant Barrier  Here’s how to tell if your home could benefit from a radiant barrier:  High Cooling Costs  If your summer energy bills are sky-high, your attic may be letting in too much heat.  Uneven Room Temperatures  Some rooms may be much warmer than others. This often means heat is sneaking in from above.  Overworked Air Conditioner  If your AC seems to run all the time, it may be fighting against heat that’s coming through the roof.  If you notice any of these signs, an attic radiant barrier could be the right solution.  DIY or Professional Installation?  You might be tempted to install the radiant barrier yourself. That’s possible if you’re comfortable working in the attic, have the right tools, and understand safety procedures.  But hiring a professional ensures the job is done right. A trained team can install your attic radiant barrier properly without missing any areas. They’ll also choose the best placement based on your attic’s layout.  Maintenance and Durability  Once installed, radiant barriers need very little care. They don’t wear out quickly and can last as long as your roof. Just make sure not to cover them with dust or insulation, as that can reduce their effectiveness.  Regular attic inspections can help you keep the barrier clean and working well. That’s it! No special maintenance or tools are needed.  What Customers Are Saying  Many homeowners who’ve installed a radiant barrier in

Uncategorized

Don’t Let Mold Take Over! Professional Remediation Services in Cary 

Mold might seem like a small problem, but it can cause serious damage to your home and your health if not treated properly. Whether you’ve spotted black spots in your bathroom or smelled something musty in your basement, it’s time to act fast. Mold remediation Cary services are here to help you get back to living in a safe and healthy space.  In this blog, we’ll walk you through everything you need to know about mold, why it spreads, and how you can stop it with professional help. From Cary mold removal to crawl space encapsulation, we’ll cover it all in a friendly and simple way.  Understanding Mold Growth in Homes  Mold is a type of fungus that grows in moist and damp areas. It loves places like basements, bathrooms, and attics—anywhere there is water damage or humidity. Mold spreads fast and can grow on walls, ceilings, wood, and even carpets.  Causes of Mold in Your Home  Leaky roofs or windows Poor ventilation  High humidity  Flooding or water damage   Damp crawl spaces   Once mold starts growing, it releases spores into the air. Breathing in these spores can cause allergies, headaches, and breathing problems. That’s why mold remediation Cary professionals are trained to not only remove the mold but stop it from coming back.  Health Risks Associated with Mold  Mold is more than just ugly. It can make you and your family sick. Some people are more sensitive to mold, especially children, the elderly, or those with asthma or allergies.  Common Health Issues Caused by Mold  Sneezing and runny nose  Itchy eyes and skin  Asthma attacks  Headaches   Breathing problems   If you notice any of these symptoms and suspect mold in your home, it’s time to call in a Cary mold removal expert. Don’t wait until the problem gets worse.  Why You Should Choose Professional Mold Remediation in Cary  You might be tempted to clean mold yourself, but that usually doesn’t solve the problem. Scrubbing mold from a wall won’t remove the spores hiding in the air or behind the surface.  That’s where mold remediation Cary services come in. Professionals use special tools and techniques to remove all mold safely and stop it from coming back.  What Professionals Do That DIY Can’t  Identify the source of moisture  Seal off affected areas to stop spread  Use commercial-grade cleaners and equipment   Perform air quality tests   Recommend long-term solutions like crawlspace encapsulation   Hiring experts means your mold problem gets fixed the right way the first time.  Services Included in Mold Remediation Cary  When you hire a local mold remediation team, they follow a step-by-step process to make sure your home is safe and clean again.  Step-by-Step Mold Removal Process  Step  Service Included  Purpose  1  Inspection and Moisture Detection  Find all mold sources  2  Containment  Prevent mold from spreading  3  Air Filtration  Clean the air of mold spores  4  Mold Removal  Remove mold from surfaces  5  Cleaning and Sanitizing  Disinfect and deodorize the area  6  Restoration  Repair any damage caused by mold  This process ensures your home is not only mold-free but also stays that way. Mold remediation Cary services are designed to make your home healthy again.  The Importance of Crawl Space Encapsulation  One of the most common places mold hides is your crawlspace. This area is often damp and dark, making it the perfect breeding ground for mold.  Crawlspace encapsulation is a solution that keeps moisture out of your crawlspace. It involves sealing the floor and walls with a heavy-duty vapor barrier and sometimes adding a dehumidifier.  Benefits of Crawl Space Encapsulation  Stops mold before it starts Lowers humidity in your home  Improves air quality  Increases energy efficiency   Adds value to your home   Including crawl space encapsulation as part of your mold plan can save you from future issues.  Choosing the Right Mold Remediation Company in Cary  You want a company that cares about your home as much as you do. When choosing a mold remediation Cary expert, look for a team with experience, good reviews, and clear communication.  What to Look For in a Mold Removal Company  Licensed and insured  Local knowledge of Cary climate  Fast response times  Transparent pricing  Offers Cary mold removal and crawlspace encapsulation   Choosing the right team can make the difference between a temporary fix and a long-term solution.  Preventing Mold Before It Starts  Once your home is mold-free, you want to keep it that way. Prevention is key. Luckily, there are simple steps you can take.  Mold Prevention Tips for Your Home  Fix any leaks right away  Use dehumidifiers in damp areas  Keep bathrooms and kitchens well ventilated  Install crawlspace encapsulation to block ground moisture   Schedule regular inspections with a Cary mold removal company   Prevention saves you money and stress. Keep mold out for good with these habits.  Let’s Recap the Key Takeaways  Dealing with mold can feel overwhelming, but with the right team on your side, it doesn’t have to be. Here’s a quick summary:  Mold is dangerous and spreads fast  Professional help is the best way to remove it   Mold remediation Cary services offer full solutions  Cary mold removal is more effective than DIY methods   Crawlspace encapsulation stops mold from returning   Prevention and regular maintenance are key to a healthy home   Ready to Take Action? Contact Us Today!  Don’t let mold take over your home and your health. You deserve to breathe clean air and live in a mold-free space. Whether it’s a small patch on your wall or a major infestation in your basement, our team is here to help.  Take the first step to a safer, healthier home. Call our mold remediation Cary experts today. From Cary mold removal to full crawl space encapsulation, we’ve got you covered.  FAQs (Frequently Asked Questions): How do I know if I have mold in my home? Common signs of mold include visible mold spots on walls, ceilings, or floors, a musty smell, and health symptoms like coughing, sneezing, or itchy

Uncategorized

Top 10 Reasons to Choose Spray Foam Insulation Crawl Space Upgrades Today

When it comes to making your home more energy-efficient, safe, and comfortable, you might not immediately think about your crawl space. But did you know that upgrading your crawl space with spray foam insulation can bring a lot of benefits? In fact, many homeowners are choosing spray foam insulation crawl space upgrades today—and for good reason.  Let’s take a friendly walk through the top 10 reasons why you should consider making this smart change for your home. It’s time to take control of your energy bills, indoor air quality, and peace of mind.  Improves Energy Efficiency  Less heat loss through the floor  Your crawl space plays a big part in how much energy your home uses. If it’s not insulated properly, heat can easily escape through the floors. Spray foam insulation crawl space upgrades seal gaps and cracks, keeping the warm air inside during winter and cool air inside during summer.  Lower monthly energy bills  When less heat or cool air escapes your home, your HVAC system doesn’t have to work as hard. That means you’ll see a drop in your monthly energy bills. Over time, this can lead to big savings.  Seals Air Leaks  Keeps outside air out  Drafty crawl spaces let outside air in, making your home less comfortable. Spray foam insulation crawl space upgrades create an airtight seal that blocks drafts and outdoor air from sneaking in.  Helps HVAC systems work better  When air leaks are sealed, your heating and cooling systems don’t need to run as often or as long. This not only saves energy but also extends the life of your systems.  Adds Moisture Protection  Stops water from seeping in  Moisture can cause major problems in crawl spaces. Spray foam for waterproofing helps block water from entering and damaging your home’s structure.  Reduces the risk of mold  Moist, dark crawl spaces are the perfect breeding ground for mold and mildew. By using spray foam insulation crawl space upgrades, you reduce the chance of mold growing in your home.  Prevents Pest Infestations  Blocks access for rodents and insects  Pests love dark, damp crawl spaces. The tiny openings around your foundation or floor can become entry points for bugs, mice, and other unwanted guests. Spray foam seals those gaps tight.  Creates an unwelcoming environment for pests  Not only does spray foam insulation crawl space sealing block pests from getting in, but it also removes the moist and cozy conditions they love.  Increases Indoor Comfort  Maintains even temperatures  Without insulation, floors can feel freezing in the winter and hot in the summer. Spray foam insulation crawl space upgrades help keep temperatures more balanced throughout your home.  Reduces cold drafts  Ever felt a sudden chill in a certain spot of your house? That might be because of air sneaking in through your crawl space. Insulating it helps stop those unpleasant drafts.  Improves Indoor Air Quality  Stops outdoor pollutants from entering  Dirty air from outside, including pollen, dust, and car fumes, can enter your home through the crawl space. Spray foam insulation crawl space upgrades block these particles and help keep the air inside fresh and clean.  Reduces allergens and irritants  When air leaks are sealed and moisture is controlled, you lower the chances of allergens and irritants like mold spores, pollen, and pet dander spreading through your home.  Strengthens Structural Integrity  Supports flooring and foundation  Crawl space insulation adds an extra layer of protection to your home’s foundation. Spray foam sticks firmly to surfaces, helping to strengthen walls and support the floor above.  Helps prevent rot and damage  Moisture and pests can slowly eat away at wooden beams and supports. Spray foam insulation crawl space upgrades help stop that by keeping moisture out and pests away.  Long-Lasting Results  Doesn’t settle or sag  Unlike traditional insulation like fiberglass, spray foam holds its shape over time. It won’t fall down or get soggy. That means once it’s in place, it keeps doing its job for years.  Keeps working year after year  One of the biggest benefits of spray foam insulation crawl space upgrades is that they last a long time. Once installed, you don’t need to worry about replacing or repairing it anytime soon.  Eco-Friendly Option  Reduces energy use  By making your home more energy-efficient, you’re using less power and reducing your carbon footprint. Every bit helps when it comes to protecting the planet.  Fewer materials wasted  Because spray foam insulation crawl space upgrades last so long and perform so well, there’s less waste over time compared to other types of insulation.  Boosts Home Value  Makes your home more attractive to buyers  Energy efficiency is a big selling point in today’s housing market. When you tell potential buyers that your crawl space is upgraded with spray foam, they’ll see it as a bonus.  Reduces home inspection issues  A well-insulated, dry, and pest-free crawl space is less likely to cause trouble during a home inspection. That can lead to smoother sales and even higher offers.  Adds Waterproofing Benefits  Helps keep crawl space dry  Spray foam for waterproofing is an extra benefit you get with crawl space upgrades. It helps repel water, keeping the entire area below your home dry and safe.  Protects against flood damage  In areas with high humidity or frequent rain, a waterproofed crawl space gives you peace of mind. Spray foam insulation crawl space upgrades create a solid barrier that can reduce water-related damage.  You’ve made it through the top 10 reasons to choose spray foam insulation crawl space upgrades today. Hopefully, now you can see how much of a difference this single improvement can make for your home. From energy savings to pest control and better air quality, the benefits are too good to ignore.  If you’re ready to take the next step toward a cleaner, healthier, and more energy-efficient home, it’s time to act.  Contact Us Today!  Want to learn more or schedule an inspection? Reach out to us today! Whether you need a quote, more info, or just want to talk about options, we’re here

Uncategorized

Secrets Mold Remediation Pros Don’t Want You to Know

If you’ve ever stepped into your crawl space and noticed a musty smell or spotted strange black or green spots on the wood or walls, you’re not alone. Many homeowners deal with mold in crawl spaces, and it can be both frustrating and a little scary. But here’s the thing most professionals won’t tell you — crawl space mold remediation doesn’t have to be a mystery or cost a fortune.  In this blog, I’m going to let you in on some insider secrets about crawl space mold remediation. We will share what professionals often keep to themselves, how you can better protect your home, and what really goes into keeping your crawl space clean and mold-free. So, grab a cup of coffee and let’s dive in — one-on-one.  Understanding Mold in Your Crawl Space  Why Crawl Spaces Are Mold Magnets  Crawl spaces are dark, damp, and poorly ventilated. That makes them the perfect breeding ground for mold. When moisture seeps in from the ground or your HVAC system leaks, mold spores get the green light to grow. Once that happens, crawl space mold remediation becomes necessary to stop the spread.  How Mold Affects Your Home  Mold in your crawl space doesn’t stay put. It can affect the air quality in your home and cause health issues like allergies, coughing, and even breathing problems. That’s why crawl space mold remediation is so important. It helps you protect your home and your health.  The Hidden Truth About Crawl Space Mold Remediation  Not Every Mold Job Needs a Full Remediation Team  Here’s a secret many companies won’t admit: not all mold problems need an expensive, full-scale crawl space mold remediation service. If you catch mold early, there are steps you can take yourself. Many professionals make it seem like it’s too complex to do on your own, but that’s not always true.  Overpricing Is More Common Than You Think  It’s true. Some contractors inflate crawl space mold remediation cost just because most homeowners don’t understand the process. Don’t be afraid to ask for itemized quotes. You deserve to know what you’re paying for.  Simple Steps Can Prevent Mold  You might be surprised to know that simple fixes like installing a vapor barrier or improving ventilation can prevent mold growth in your crawl space. Most companies won’t tell you this because it reduces the chance you’ll call them back. But prevention is a big part of crawl space mold remediation.  How Mold Remediation Really Works  Inspection Comes First  A proper crawl space mold remediation starts with a thorough inspection. This means checking for moisture sources, visible mold, and even testing air quality if needed. Don’t let anyone skip this step — it’s crucial.  Moisture Control Is the Key  If moisture isn’t dealt with, mold will come back even after removal. Real crawl space mold remediation always includes fixing leaks, sealing entry points, and sometimes adding a dehumidifier or sump pump.  Cleaning the Mold  Once the space is dry, it’s time to clean the mold. This might involve scrubbing surfaces with mold-killing products, removing damaged insulation, or even sanding wood beams. A true crawl space mold remediation job makes sure the mold is gone — not just covered up.  The Cost of Mold Remediation in Crawl Spaces  Factors That Affect the Cost  Crawl space mold remediation cost can vary based on the size of your crawl space, the extent of the mold, and how hard it is to access the area. Mold on wood or insulation might cost more to treat than mold on plastic or concrete.  Average Cost Range  The crawl space mold remediation cost typically ranges from $500 to $6000. The lower end is usually for small, surface-level issues. The higher end can include structural repairs or installing systems to prevent future mold.  Tips for Choosing the Right Mold Remediation Company  Ask for Certifications  Make sure the company is certified in mold remediation. This proves they follow proper safety and removal practices. Don’t be afraid to ask for proof.  Get Multiple Estimates  Always get at least two or three quotes before deciding. This helps you compare crawl space mold remediation cost and spot any red flags in pricing.  Check Reviews  Online reviews can tell you a lot. Look for companies with consistent ratings and feedback. If others had a great experience with their crawl space mold remediation, you probably will too.  DIY Mold Remediation: When It’s Safe to Do It Yourself  When DIY Is Okay  If the mold covers less than 10 square feet, you might be able to handle it yourself. Use protective gear, proper cleaning agents, and make sure you fix any moisture problems. This kind of crawl space mold remediation can save you money and give you peace of mind.  When to Call the Pros  If the mold is widespread, black in color, or caused by sewage or flooding, it’s best to hire a professional. This is where crawl space mold remediation should be left to the experts — safety first.  Preventing Mold from Coming Back  Keep Moisture Out  Moisture is mold’s best friend. Keep it out by sealing vents, adding a vapor barrier, and using a dehumidifier if needed. Crawl space mold remediation isn’t just about removing mold — it’s about keeping it gone for good.  Regular Inspections Help  Don’t wait until mold takes over. Check your crawl space twice a year for damp spots, mold smells, or visible signs. Early detection makes crawl space mold remediation quicker and cheaper.  What Professionals May Not Want You to Know  They Use the Same Products You Can Buy  Many crawl space mold remediation companies use commercial-grade cleaning agents you can find at hardware stores. Don’t let them make it sound like they have secret tools — you can get quality products, too.  You Can Learn a Lot Online  There are great videos, articles, and even step-by-step guides online that walk you through crawl space mold remediation. Educate yourself and save money.  Some Services Are Optional  Not every service pitched during

Uncategorized

Is Spray Foam Insulation Crawl Space Worth It? Experts Weigh In

When it comes to home improvements, ensuring your home stays energy-efficient and comfortable is key. One of the best ways to achieve this is by insulating your crawl space. But should you use spray foam insulation crawl space? Many homeowners are asking this question, and experts have a lot to say about it.   Let’s break it down for you and help you decide whether spray foam insulation for your crawl space is worth the investment.  Understanding Spray Foam Insulation Crawl Space  Spray foam insulation crawl space is a modern insulation option used to seal and insulate the often-overlooked crawl spaces of homes. These spaces, though small and hidden, can have a big impact on your home’s energy efficiency, comfort, and even health. By applying spray foam insulation to your crawl space, you effectively close any gaps and cracks where drafts, moisture, and pests can enter.  Spray foam insulation for crawl space works differently than traditional insulation materials. It expands when sprayed, creating a tight seal that prevents air leaks and moisture buildup. This results in a more controlled environment beneath your home.  Benefits of Spray Foam Insulation Crawl Space  You may be wondering, what makes spray foam insulation crawl space so beneficial? Let’s break it down:  Energy Efficiency  The biggest reason to consider spray foam insulation crawl space is energy efficiency. Traditional fiberglass insulation can settle over time, leading to gaps where air can leak in or out. Spray foam, on the other hand, expands and fills in every nook and cranny, providing a tight seal. This seal keeps warm air inside during winter and cool air inside during summer, making your home more energy-efficient and reducing your utility bills.  Moisture Control  A major concern for crawl spaces is moisture. High humidity or water seepage can lead to mold growth, wood rot, and even pest infestations. Spray foam insulation crawl space acts as a barrier, preventing moisture from entering and keeping your crawl space dry. This can be especially beneficial if you’re looking to install spray foam for waterproofing purposes, ensuring that your home stays safe from the dangers of water damage.  Improved Air Quality  Moisture and mold in your crawl space can lead to poor indoor air quality, which can affect your health. Spray foam insulation crawl space helps keep humidity levels low, which in turn reduces the chances of mold growth. By sealing out drafts, you also prevent dust, allergens, and pests from entering your home. This leads to cleaner air inside your living space, which is especially helpful for those with allergies or respiratory conditions.  Increased Home Value  Investing in spray foam insulation crawl space can increase the value of your home. Homes with well-insulated crawl spaces tend to be more attractive to potential buyers, as they know it’s a step toward energy savings and a healthier environment. Additionally, since spray foam insulation can last for many years without degrading, it’s a feature that can set your home apart in a competitive market.  Noise Reduction  If you live in a noisy neighborhood or have children who tend to be loud, spray foam insulation crawl space can also act as a sound barrier. The foam’s ability to expand and fill spaces helps reduce sound transmission. This can lead to a quieter home environment, especially if you have rooms above the crawl space.  Spray Foam for Waterproofing  You might be wondering, can spray foam insulation crawl space also help with waterproofing? The answer is yes! Many people use spray foam for waterproofing purposes in their crawl spaces. When applied correctly, spray foam can serve as a strong moisture barrier, protecting your home from water damage.  Here’s how spray foam insulation crawl space can work in conjunction with waterproofing:  Sealing gaps and cracks: Spray foam fills every crack and gap, preventing water from entering the crawl space. Humidity control: As mentioned earlier, it prevents moisture buildup, which is a key factor in keeping your crawl space dry and protected from water damage. Durability: Unlike other waterproofing solutions, spray foam does not degrade over time, ensuring long-lasting protection for your crawl space. Is Spray Foam Insulation Crawl Space Worth It?  Now that you know the many benefits, you might still be asking yourself, “Is it really worth it to invest in spray foam insulation crawl space?” Here’s a breakdown to help you decide:  Initial Investment: Spray foam insulation tends to cost more upfront than traditional options like fiberglass. However, it lasts longer and offers better performance, so you may end up saving money in the long run due to lower energy bills and fewer maintenance issues. Long-Term Savings: The benefits of spray foam insulation crawl space can quickly add up in energy savings. By keeping your home warmer in winter and cooler in summer, you will likely see a reduction in your heating and cooling bills. Health and Comfort: If you live in an area with high humidity or mold issues, spray foam insulation crawl space is a great way to improve your indoor air quality and comfort.  Who Should Consider Spray Foam Insulation Crawl Space?  Homeowners with drafty homes: If you notice drafts in your living spaces, your crawl space could be the culprit. Spray foam insulation can help seal up the space and keep your home comfortable year-round.  Those concerned about moisture and mold: If your crawl space is prone to moisture or mold, spray foam insulation can be an effective way to tackle these issues. Energy-conscious homeowners: If you’re looking for ways to reduce your energy bills and increase your home’s efficiency, spray foam insulation crawl space is a smart investment. How to Get Spray Foam Insulation Crawl Space Installed  If you’re convinced that spray foam insulation crawl space is the right choice for your home, the next step is installation. It’s important to hire professionals who know how to properly install spray foam insulation. Improper installation can lead to issues like over-expansion or inadequate coverage.  Hiring a Professional for Spray Foam Insulation Crawl Space  When looking

Uncategorized

How to Stop Crawl Space Mold Before It Spreads

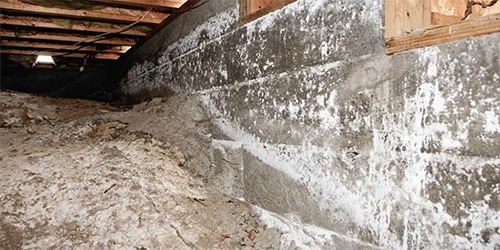
If you’ve ever dealt with mold in your home, you know how frustrating and concerning it can be. But when it comes to crawl spaces, mold can quickly become a hidden enemy, silently spreading and causing damage. Luckily, with proper crawl space mold remediation, you can stop mold before it takes over and protects your home from future problems.  In this blog, we’ll walk you through everything you need to know about crawl space mold remediation, why it’s important, and how you can get rid of mold before it causes harm to your home. Let’s dive right in!  What is Crawl Space Mold Remediation?  Crawl space mold remediation is the process of identifying, removing, and preventing mold growth in the crawl space under your home. Crawl spaces are often damp and dark, which creates the perfect environment for mold to grow. Over time, mold can cause damage to the structure of your home, create unpleasant odors, and even lead to health issues.  Mold can be a tricky problem, especially when it’s in your crawl space, where it’s not easy to spot. That’s why mold remediation is essential for maintaining a safe and healthy living environment.  Why Is Crawl Space Mold Remediation Important?  Taking care of mold in your crawl space is critical for several reasons:  Health Concerns: Mold can affect indoor air quality and cause breathing problems, allergies, and other health issues, especially if you or your family members suffer from asthma or respiratory issues.  Structural Damage: Mold doesn’t just grow on surfaces; it can also damage the materials that make up your home’s structure. Over time, mold can weaken wood, insulation, and even the foundation of your home.  Odor Issues: Mold growth can lead to musty odors, which can spread throughout your home, making your living space unpleasant.   How Does Crawl Space Mold Grow?  Before we dive into the steps for crawl space mold remediation, it’s important to understand how mold grows. Mold thrives in damp and humid environments, making crawl spaces a prime location. The following factors can encourage mold growth:  Moisture: Leaky pipes, poor drainage, or water seepage can introduce moisture into your crawl space, making it a perfect breeding ground for mold.  Lack of Ventilation: Crawl spaces are often poorly ventilated. Without proper airflow, moisture can get trapped, allowing mold to spread easily.  Temperature: Mold grows best in temperatures between 60°F and 80°F. If your crawl space stays within this range and is damp, it’s the perfect mold-growing environment.   By understanding these factors, you can better prepare for crawl space mold remediation before mold becomes a serious issue.  Steps to Crawl Space Mold Remediation  When it comes to crawl space mold remediation, taking the right steps is key to eliminating mold and keeping your crawl space dry. Here’s a step-by-step guide to the process:  Step 1: Identify the Mold Problem  The first step in crawl space mold remediation is identifying where the mold is growing. This can be challenging since mold often hides in dark, hard-to-reach areas. Look for signs of moisture, musty odors, or visible mold on the surfaces in the crawl space.  If you’re unsure whether you have mold, it’s always a good idea to hire a professional mold inspector to assess your crawl space.  Step 2: Remove the Mold  Once you’ve identified the mold, the next step is to remove it. Here’s what you’ll need:  Protective gear like gloves, goggles, and a mask to prevent inhaling mold spores.  Mold removal products or a mixture of water and detergent.   Scrub brushes and a vacuum with a HEPA filter to clean up the mold.   If the mold is widespread, it’s best to call in a professional to handle the removal. Trying to clean it yourself could worsen the problem or expose you to harmful mold spores.  Step 3: Control the Moisture  After you’ve removed the mold, the next important step in crawl space mold remediation is controlling the moisture. Mold thrives in damp conditions, so you need to reduce the humidity in your crawl space.  Install a Vapor Barrier: A vapor barrier is a plastic sheet that covers the dirt floor of your crawl space, preventing moisture from rising and creating a humid environment.   Improve Ventilation: Ensure your crawl space has enough ventilation to allow air to circulate. This can help keep moisture levels down.  Fix Water Leaks: Check for any leaks or standing water in your crawl space. Fixing leaky pipes or improving drainage can help prevent water from getting trapped.   Step 4: Inspect and Repair Structural Damage  Mold can cause significant damage to your crawl space’s structure. Once the mold is gone, take a close look at the wood beams, insulation, and foundation. If any of these materials have been weakened or damaged by mold, you may need to repair or replace them.  Step 5: Prevent Future Mold Growth  The last step in crawl space mold remediation is taking steps to prevent mold from returning. Here’s how:  Control Humidity: Keep your crawl space’s humidity levels below 60% by using a dehumidifier if necessary.  Seal Gaps and Cracks: Seal any gaps or cracks in your crawl space to keep moisture from seeping in.   Regular Inspections: Make it a habit to check your crawl space periodically for signs of mold or moisture problems.   By following these steps, you can prevent mold from taking over your crawl space and causing further damage.  Crawl Space Mold Remediation Cost  When it comes to crawl space mold remediation cost, it can vary based on the severity of the mold problem, the size of your crawl space, and whether you need professional help. On average, crawl space mold remediation cost can range from $500 to $5,000.  Here’s what can affect the cost:  Size of the Area: The larger the crawl space, the more it will cost to remediate.  Extent of the Damage: If mold has spread significantly, more extensive remediation will be needed, which can increase the cost.   Type of

Uncategorized

DIY Solar Attic Fan Installation vs. Professional Installation: Which One Is Right for You?

Introduction  When it comes to improving your home’s energy efficiency, installing a solar attic fan can be a game-changer. However, deciding whether to take on this project yourself or hire a professional can be tricky. Both DIY and professional installations come with their own set of advantages and challenges. In this guide, we’ll walk you through everything you need to know to make an informed decision before you install a solar attic fan.  Our Services  What is a Solar Attic Fan? A solar attic fan installation is a sustainable solution designed to improve air circulation and regulate temperature in your attic. Powered by solar energy, these fans reduce the heat build-up that can strain your air conditioning system during hot weather, thereby lowering energy costs.  Benefits of Solar Attic Fans  Energy Savings: Solar attic fan installation helps reduce the need for air conditioning, saving you money on your energy bill.  Improved Air Quality: By enhancing airflow in the attic, they reduce the risk of moisture accumulation, which can lead to Mould growth.  Environmentally Friendly: As a renewable energy solution, solar fans contribute to a greener, more sustainable home.  DIY Solar Attic Fan Installation  If you’re a handy homeowner who enjoys tackling projects yourself, a DIY solar attic fan installation could be a cost-effective option. Here’s what you need to consider before you decide to install a solar attic fan yourself.  The Pros of DIY Installation  Cost Savings: One of the most significant advantages of DIY solar attic fan installation is avoiding professional labor costs.  Personal Satisfaction: There’s a sense of pride in completing home improvement projects yourself.  Control Over the Process: You get to choose the fan model and installation location that best suits your needs.  The Cons of DIY Installation  Time-Consuming: Installation can take longer than expected, especially if you’re not familiar with the process.  Risk of Errors: If you’re not experienced with electrical wiring and roof work, mistakes can happen, potentially leading to more expensive repairs.  Lack of Guarantees: Unlike professional installation, DIY projects may not come with warranties or guarantees.  Steps for Installing a Solar Attic Fan Yourself  Choose the Right Fan: Select a fan with the proper specifications based on your attic size and needs.  Gather the Necessary Tools: You’ll need tools like a drill, screwdriver, measuring tape, and safety gear for the installation process.  Prepare Your Attic: Ensure your attic is free of obstacles that could interfere with fan placement.  Install the Fan: Mount the fan and connect it to your solar panel system according to the manufacturer’s instructions.  Test the Fan: Once installed, test the fan to ensure it’s functioning correctly and providing optimal airflow.  Professional Solar Attic Fan Installation If you’re unsure about DIY installation or prefer a hassle-free experience, hiring a professional installer may be the right choice for you. Here’s what to know about professional solar attic fan installation.  The Pros of Professional Installation  Expertise: Professional installers have the knowledge and experience to complete the installation efficiently and correctly.  Safety: Professionals are trained to handle electrical systems and roof installations, reducing the risk of injury.  Warranty and Guarantees: Many professionals offer warranties on the installation, providing peace of mind.  The Cons of Professional Installation  Cost: Professional installation typically comes with higher upfront costs compared to DIY methods.  Less Control: You might not have as much say in the choice of the fan or installation details.  Scheduling Delays: Depending on the company, you may need to wait for availability or face delays.  What to Expect When You Hire a Professional Installer  Consultation: The professional will assess your attic and recommend the best solar attic fan for your needs.  Quotation: You’ll receive a detailed estimate that outlines the cost of the installation.  Installation: The professional will handle all aspects of the installation, from mounting the fan to connecting the solar panel.  Testing and Adjustments: Once installed, the professional will test the fan to ensure it works optimally.  Which Option Is Right for You? Deciding between DIY solar attic fan installation and hiring a professional depends on several factors, including your budget, skill level, and time availability. Let’s break down which option might be best for your situation.  When to Choose DIY Installation  You’re comfortable with home improvement projects and have basic knowledge of electrical systems.  You want to save on labor costs and don’t mind investing extra time into the project.  Your attic has easy access, and the installation is relatively straightforward.  When to Choose Professional Installation  You want the job done quickly and efficiently with minimal risk of errors.  You’re not familiar with electrical systems or working at heights.  You prefer to have a warranty and guarantee for peace of mind.  Conclusion Both DIY and professional solar attic fan installation have their advantages and disadvantages. If you’re confident in your skills and looking to save money, DIY installation might be the right choice. However, if you’re seeking a hassle-free, reliable installation with expert help, hiring a professional installer could be the better option. No matter which you choose, a solar attic fan is a smart investment in your home’s energy efficiency.  Our Services  FAQs (Frequently Asked Questions): What is a thermal barrier and why is it important? A thermal barrier is a material that provides fire protection by delaying the spread of flames and heat. It plays a crucial role in building safety by ensuring that insulation materials, like spray foam, do not contribute to fire hazards. When is a thermal barrier necessary when using spray foam insulation? A thermal barrier is typically necessary in areas such as basement rim joists and attics, especially when these spaces are used for storage or habitation. The International Residential Code (IRC) outlines specific requirements for when a thermal barrier must be installed. What are the IRC's key requirements regarding thermal barriers? The IRC mandates that foam plastic insulation must be covered with a thermal barrier unless certain exceptions apply. One key requirement is the ’15-minute rule’, which states that the thermal barrier must withstand direct flame for at

Uncategorized

Why Solar Attic Fan Installation is a Smart Move for Energy Efficiency

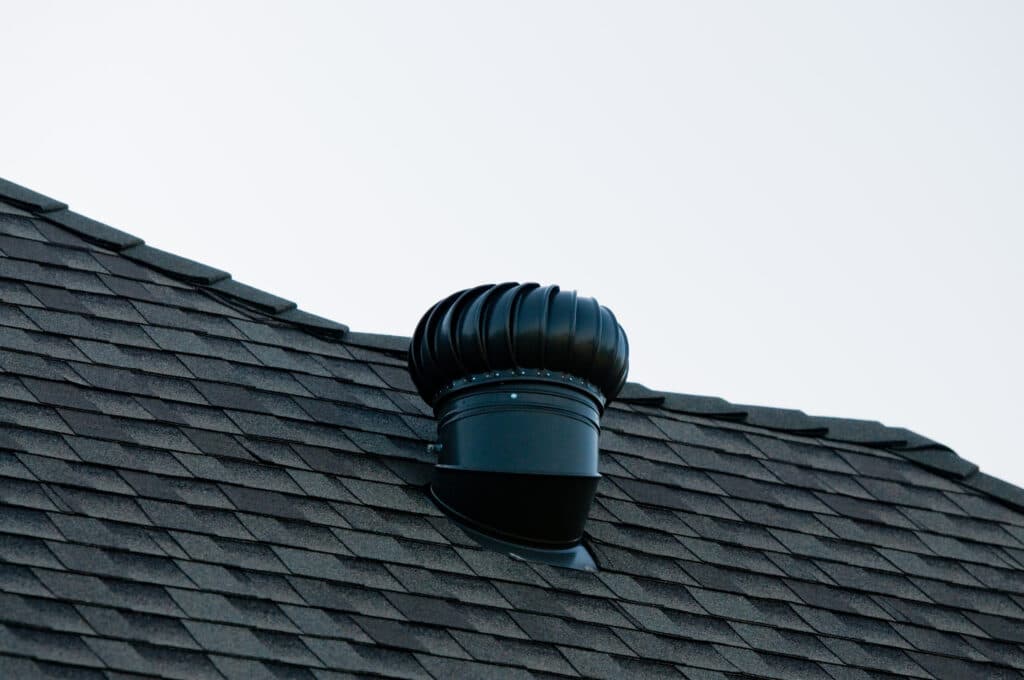
Energy efficiency is a top priority for homeowners looking to cut utility bills and create a comfortable indoor environment. One of the most effective solutions is solar attic fan installation. These fans use solar power to remove excess heat and moisture, reducing strain on HVAC systems and lowering cooling costs.  At Triangle Radiant Barrier, we specialize in energy-efficient solutions that help homeowners in the USA improve ventilation and maintain optimal attic conditions. In this guide, we’ll explore the benefits of solar attic fan installation, how they work, and why they are a smart investment.   What is a Solar Attic Fan?  A solar attic fan is a ventilation system powered by solar energy. It is installed on the roof and operates using sunlight, pulling hot air out of the attic and replacing it with cooler outdoor air. Unlike traditional electric attic fans, solar-powered fans run without increasing electricity bills.  How Solar Attic Fans Work  Solar Panel Absorbs Sunlight – The fan is powered by a solar panel that captures sunlight and converts it into energy.  Fan Activates Automatically – When the attic temperature rises, the fan starts pulling out hot, stale air.  Fresh Air Circulates – Cooler air from outside replaces the hot air, regulating attic temperature.  Benefits of Installing a Solar Attic Fan  Installing a solar attic fan comes with numerous advantages, not only for energy efficiency but also for maintaining the health and longevity of your home. Let’s take a closer look at some of these benefits:  Energy Efficiency and Lower Utility Bills By removing excess heat from the attic, solar attic fans reduce the workload on your air conditioning system. This leads to lower energy consumption, resulting in lower cooling costs. Over time, the savings can offset the initial cost of installation, making it a financially smart choice.  Improved Ventilation and Air Quality A well-ventilated attic helps to regulate temperature and moisture levels, preventing the buildup of heat and humidity. Install solar attic fans to ensure proper air circulation and improve the overall indoor air quality.  Extended Roof and HVAC System Lifespan Excess heat and moisture in the attic can cause damage to the roof, insulation, and even your HVAC system. By maintaining a cool attic temperature with a solar attic fan, you can protect these components and extend their lifespan.  Environmentally Friendly Solar attic fans rely on renewable energy, reducing your reliance on traditional electricity. This sustainable solution helps reduce your carbon footprint, making it an environmentally conscious choice.  How to Install a Solar Attic Fan  The process of installing a solar attic fan is relatively simple, but it is recommended to hire a professional to ensure proper installation. Here’s an overview of the general process:  Step 1: Choose the Right Fan for Your Home  Selecting the right solar attic fan depends on the size of your attic and the amount of airflow needed. A professional installer can assess your attic space and recommend the best fan size for optimal performance.  Step 2: Installation of Solar Panel and Fan  The solar panel will be installed on the roof in a location that receives maximum sunlight. The fan is then mounted on the roof or attic, and the wiring connects the solar panel to the fan.  Step 3: Testing and Adjustment  Once installed, the fan is tested to ensure it operates correctly. Any necessary adjustments to positioning or airflow will be made to ensure maximum efficiency.  How Solar Attic Fan Installation Can Improve Your Home’s Energy Efficiency  Lower Energy Costs  A solar attic fan can lower cooling costs by regulating the temperature of your attic. Install solar attic fans to reduce the burden on your air conditioning system and keep your home cool without high electricity bills.  Preventing Overheating  Attics can become extremely hot, particularly during the summer months. Without proper ventilation, this heat can seep into the living spaces below, making it harder to maintain a comfortable indoor temperature. Solar attic fans remove this heat and prevent your air conditioning system from working overtime.  Healthier Living Environment  Excessive moisture in the attic can lead to mould growth, wood rot, and damage to insulation. Solar attic fan installation helps keep moisture levels in check by ensuring proper airflow, contributing to a healthier living environment.  Why Choose Triangle Radiant Barrier for Your Solar Attic Fan Installation?  At Triangle Radiant Barrier, we specialize in providing high-quality energy-efficient solutions, including solar attic fan installations. Here’s why you should choose us for your installation:  Expertise and Experience  With years of experience in the energy efficiency industry, we understand the unique needs of homeowners and offer tailored solutions for maximum benefit.  High-Quality Products  We only use top-of-the-line solar attic fans that are built to last and provide optimal performance.  Comprehensive Services  From installation to maintenance, Triangle Radiant Barrier offers comprehensive services to ensure your solar attic fan works efficiently for years to come.   Additional Tips for Maximizing the Effectiveness of Your Solar Attic Fan  Regular Maintenance – Clean the solar panel and fan to ensure they are operating at peak efficiency.  Check for Obstructions – Make sure the attic vents are clear and not blocked by insulation or debris.  Monitor Attic Temperature – Regularly check your attic’s temperature and humidity levels to ensure your fan is working effectively.   Conclusion  Solar attic fan installation is a smart move for homeowners looking to improve their home’s energy efficiency, reduce cooling costs, and promote better ventilation. By using solar power, these fans provide an eco-friendly solution to controlling attic temperature and moisture.  If you’re ready to make the switch to a more energy-efficient home, trust Triangle Radiant Barrier to help you with expert solar attic fan installation. Our team is dedicated to providing high-quality solutions that keep your home comfortable and energy-efficient year-round.  FAQs (Frequently Asked Questions): What is a thermal barrier and why is it important? A thermal barrier is a material that provides fire protection by delaying the spread of flames and heat. It plays a crucial role in building safety by

Builder,Insulating,Wooden,Frame,House.,Close,Up,View,Of,Man
Uncategorized

Do You Need a Thermal Barrier When Using Spray Foam?

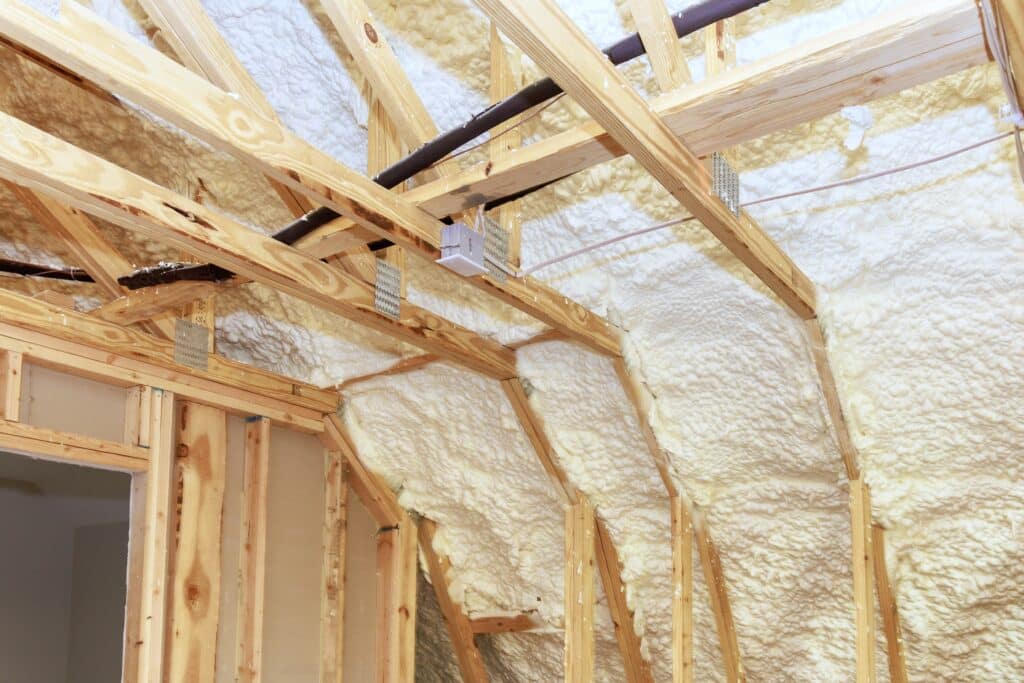
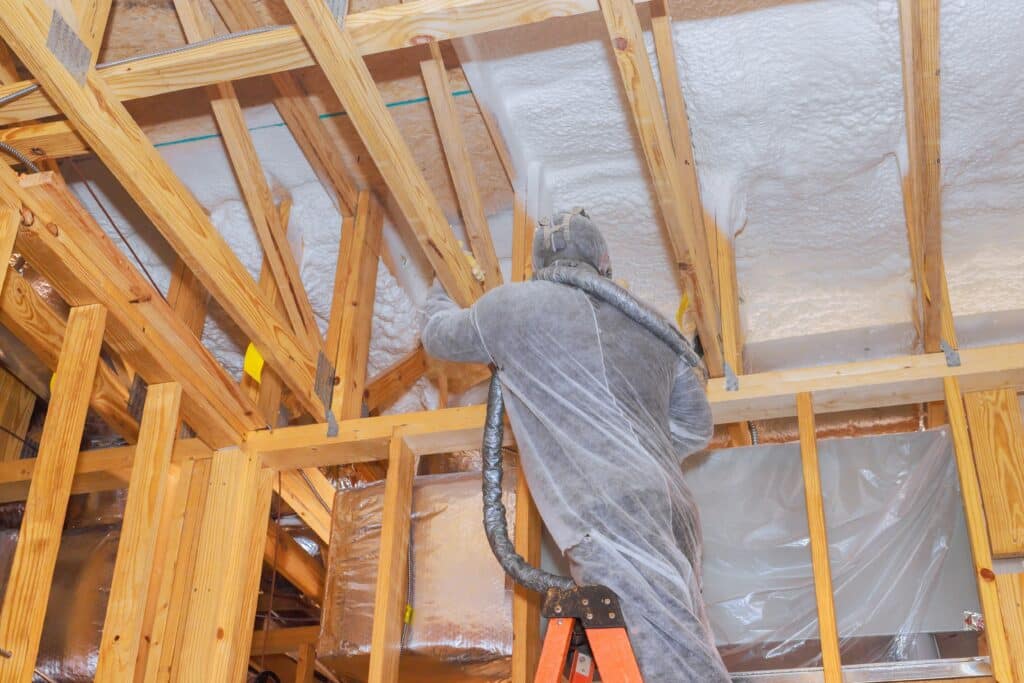
When considering spray foam insulation, a common question arises: Do you need a thermal barrier? A thermal barrier is a material that serves to protect the interior living space from the combustible nature of spray foam by providing crucial fire safety. Its primary role is to offer 15-minute protection, allowing occupants time to escape in the event of a fire. Misunderstandings often exist regarding the necessity and application of thermal barriers with spray foam insulation. Some believe that spray foam alone is sufficient for fire protection, while others are unsure about when and where these barriers are required. This article aims to clarify these misconceptions by exploring when a thermal barrier is essential in conjunction with spray foam insulation. By understanding these requirements, homeowners can ensure their properties meet fire safety standards and comply with building regulations effectively. For those considering options for crawl space improvement or crawl space encapsulation, it’s important to understand how thermal barriers play a role in these areas as well. Additionally, homeowners can benefit from reading reviews about various thermal barrier products available in the market. For more detailed information on the subject, this blog provides valuable insights into the topic. Understanding Thermal Barriers with Spray Foam Definition and Importance of Thermal Barriers A thermal barrier is a protective layer installed between spray foam insulation and interior living spaces. Its primary function is to enhance building safety by providing a critical layer of fire protection. In the event of a fire, the thermal barrier serves to: Delay Ignition: It slows down the ignition process of the underlying spray foam. Provide Escape Time: Offers occupants at least 15 minutes to evacuate safely, aligning with the standards set by building codes. Thermal barriers are essential in reducing the risk of rapid fire spread, ultimately safeguarding lives and property. Functionality with Spray Foam Insulation When used with spray foam insulation, thermal barriers act as a shield against high temperatures. Here’s how they work: Heat Resistance: Materials like half-inch gypsum board can withstand heat for a specified duration, preventing direct exposure of the combustible foam. Integrity Maintenance: The barrier helps maintain structural integrity during a fire, thereby minimizing damage. By incorporating thermal barriers, buildings meet safety regulations while maximizing the insulating benefits of spray foam. This combination ensures compliance with fire safety standards without compromising on energy efficiency or comfort. The International Residential Code (IRC) and Thermal Barriers Requirements The International Residential Code (IRC) is a set of building codes that ensure safety and legality in residential construction. It was developed by the International Code Council and outlines the requirements that builders must follow to create safe, sustainable, and modern structures. One important aspect covered by the IRC is insulation materials, specifically foam plastic insulation like spray foam. IRC Requirements for Foam Plastic Insulation According to IRC regulations for insulation, foam plastic insulation must be separated from the interior living space by an approved thermal barrier. This requirement is crucial for both compliance and the safety of residents in case of a fire. The code specifies: Thermal Barrier Requirement: Foam plastic insulation should be covered with a thermal barrier that provides at least 15 minutes of protection against fire exposure. Material Standards: Commonly used materials that meet these requirements include half-inch gypsum board or equivalent products approved through rigorous testing. Key IRC Requirements for Thermal Barriers The IRC defines a thermal barrier as something that slows down heat transfer and provides protection during a fire. This delay is important for keeping people safe by giving them more time to escape. The 15-Minute Rule: A key part of the IRC’s thermal barrier requirements is the “15-minute rule.” This rule says that any material used as a thermal barrier must resist fire for at least 15 minutes. This time is critical for allowing people to evacuate safely. Approved Materials: According to IRC guidelines, materials like gypsum board are widely accepted as thermal barriers because they have been proven to meet the 15-minute rule. Other materials may also qualify if they pass recognized tests showing equal performance under fire conditions. Importance of Compliance with Insulation Code Following the insulation code requirements set by the IRC is essential for several reasons: Safety Assurance: By following these regulations, builders and contractors can ensure that installations do not put occupants’ safety at risk. Legal Obligation: Meeting IRC standards protects builders from potential legal issues arising from non-compliance and ensures that constructions are up to code. Understanding when a thermal barrier is necessary with spray foam involves recognizing how these barriers contribute to creating safer living environments. In this article, we will explore practical applications of these requirements in different areas of your home and discuss alternatives to traditional thermal barriers. Determining When Thermal Barriers are Necessary with Spray Foam Insulation Specific Areas That Require Thermal Barriers Basement Rim Joists Importance: Basement rim joists often serve as a critical connection point between the foundation and the upper floors of a home. They are pivotal in maintaining structural integrity and providing insulation against outdoor air infiltration. Thermal Barrier Requirement: Typically, when spray foam is applied to basement rim joists, a thermal barrier is required if these areas are part of or lead directly into living spaces. This is due to their potential as conduits for fire spread. Use Cases: If basement areas are used for storage or as utility rooms, a thermal barrier may be necessary. However, in cases where the basement is unoccupied or not used for any substantial activity, exemptions might apply. Consulting local building codes is advisable for specific guidelines. Attic Spaces Role: Attics can vary from being crawl spaces to fully functional storage areas or even living spaces. The use and configuration of an attic significantly influence the necessity for a thermal barrier when using spray foam insulation. Regulatory Requirements: For attics that serve as living quarters or accessible storage spaces, applying a thermal barrier over spray foam insulation is generally mandated. This requirement ensures safety by delaying the fire’s penetration through

Understanding the Importance of Sealing Crawl Space Vents
Uncategorized

Understanding the Importance of Sealing Crawl Space Vents

Understanding the Importance of Sealing Crawl Space Vents The Impact on Indoor Air Quality Why Should Crawl Space Vents Be Sealed? Sealing crawl space vents plays a crucial role in maintaining a healthy home environment. Unsealed vents allow outside air to infiltrate the crawl space, bringing with it moisture that accumulates over time. This moisture can create an ideal breeding ground for mold and mildew, which are notorious for affecting indoor air quality. Here are some key reasons why sealing crawl space vents is important: Moisture Accumulation: When outside air enters through unsealed vents, it carries humidity into the crawl space. This leads to condensation on cooler surfaces like pipes and floor joists. Over time, this persistent moisture fosters mold growth and structural damage. Mold Growth Connection: Mold thrives in damp environments, making unsealed crawl spaces perfect for its proliferation. The presence of mold not only impacts the structural integrity of your home but also introduces allergens and spores into the air, circulating throughout living spaces. Health Risks: Poor indoor air quality poses significant health risks to occupants. Exposure to mold can lead to respiratory issues such as asthma, chronic coughing, and wheezing. It can also exacerbate allergies and other sensitivities, potentially causing skin irritation or more severe respiratory problems. Sealing crawl space vents is imperative for reducing these risks by controlling the entry of humid air and preventing subsequent mold growth. This proactive measure contributes to healthier indoor conditions and enhanced comfort for residents. Understanding the link between unsealed crawl spaces and poor air quality highlights the necessity of addressing this issue promptly. By ensuring that your home’s foundation is well-protected against external elements, you can safeguard both your property and your health from the adverse effects of unchecked moisture intrusion. For comprehensive solutions to seal your crawl space effectively, consider exploring some expert advice on this subject. Additionally, it’s worth noting that investing in proper insulation and air sealing could qualify you for federal tax credits, making it a financially viable option as well. To understand how these services have benefited others, you might find it helpful to read through some customer reviews. Enhancing Energy Efficiency Crawl space vents are often installed in homes with the intention of promoting air circulation. However, leaving these vents unsealed can have significant drawbacks, particularly on a home’s energy efficiency. Sealed vents play a crucial role in maintaining a comfortable indoor environment and can substantially improve energy performance. Effects of Unsealed Vents When crawl space vents remain open, they allow cold air drafts to permeate the home during winter months and hot, humid air to enter during the summer. This uncontrolled airflow forces heating and cooling systems to work harder, leading to inefficient energy consumption. Cost Implications The inefficiencies caused by unsealed vents translate directly into higher energy bills. Homeowners may experience increased costs due to the additional strain on HVAC systems trying to maintain consistent indoor temperatures. By sealing these vents, you reduce drafts that can disrupt temperature regulation, leading to potential savings on monthly utility expenses. Understanding the impact of crawl space vent sealing goes beyond just mitigating mold and moisture issues; it directly addresses how homes manage energy resources. By improving insulation and reducing unwanted air exchange, sealed crawl spaces contribute significantly to overall household energy efficiency and comfort levels while protecting against health implications associated with poor indoor air quality. Identifying Problems Caused by Unsealed Vents Unsealed crawl space vents can lead to a host of issues that compromise both the health of your home and its occupants. Among these, moisture issues are particularly concerning due to their far-reaching consequences. Moisture Issues and Their Consequences How Humid Air Leads to Condensation and Mold Growth Crawl spaces with unsealed vents allow humid outdoor air to enter freely. When this moist air comes into contact with cooler surfaces within the crawl space, it condenses into water droplets. This condensation creates an ideal environment for mold growth, as mold thrives in damp, dark conditions. Mold not only damages materials it grows on but also poses significant health risks to inhabitants, including respiratory problems and allergies. Long-term Effects on Home Structure and Belongings Persistent moisture in crawl spaces can cause severe structural damage over time. Wood components such as joists, beams, and subflooring can begin to rot when exposed to sustained dampness, compromising the structural integrity of the entire building. Additionally, any belongings stored in these areas become susceptible to damage; metal items may rust, while fabrics and papers can become mildewed or ruined. These moisture-related problems emphasize why crawl space vents should be sealed effectively. Sealing these vents is crucial not just for preventing immediate discomforts like dampness and odors but also for safeguarding against long-term structural damage that could entail costly repairs. By addressing humidity through proper sealing methods and regular humidity assessments, homeowners can mitigate risks associated with mold growth and ensure the longevity of their property. This proactive approach helps maintain a healthy indoor environment free from the detrimental effects of excess moisture. The importance of sealing crawl space vents becomes even more apparent when considering additional complications like pest infestation. Unsealed vents provide easy access points for pests seeking shelter or food within your home, contributing further to potential structural damage. Pest Problems and Home Infestation Risks Unsealed crawl space vents can create an open invitation for pests such as rodents and insects. These small openings provide easy access points for various critters seeking shelter, warmth, and food. In the Chesapeake Bay area, where moisture issues are prevalent due to climate conditions, these pests thrive in the humid environments often found in unsealed crawl spaces. The entry of pests is not merely a nuisance; it poses significant risks to a home’s structural integrity. Here are some of the potential damages: Insulation Damage: Pests can chew through insulation materials, reducing their effectiveness and leading to increased energy costs due to compromised thermal performance. Structural Damage: Rodents and insects may gnaw on wooden structures, wires, and other materials,

Scroll to Top